
Final Stage, How to finish of your Deck
Posted on: December 9, 2015, by : deck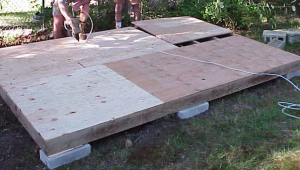
The use of stainless steel or aluminum nails is highly recommended for use on decking boards, as they will not stain the wood and never use electroplated nails as they will rust after rain showers. It is best to use three nails in a two by eight or two nails in two by fours or two by sixes (unless you are using redwood). Nails should be alternated from one side of the board to the other, which helps counter the tendency of the boards to pull. If boards are wider than eight inches, use two nails, and make sure that the nails are long enough so that at least one and a half inches is into the joist. It is highly recommended that you leave a gap of at least one eighth of an inch between each board to allow water to drain off your deck so plan accordingly!! If you have a bowed board, you can force the bows out as you nail, always nailing from one end to the other (never doing one end then the other and then ‘filling in’ the middle). If necessary, a smooth headed hammer can be used (carefully so as not to scar the wood) or a pry bar can be used to straighten the board.
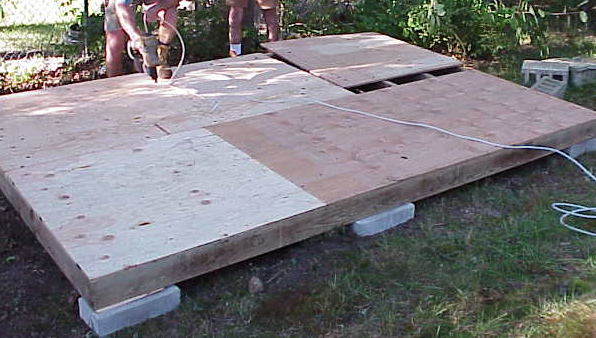
Most people who have built decks find that it is easiest to place the boards flush with the outside edge of the outer joists and allowing the overlap to remain until all of the boards are placed. If there are two deck boards in the center of a joist that have to be nailed to a joist, you can use a cordless drill to drill a starter hole (smaller than the shank of the nail) and use this to drive the nail in to prevent splitting. All exposed ends of the joists and deck boards should be waterproofed for added protection; and while you’re laying your deck boards, you should do regular visual inspections for inconsistencies in your deck.
Before you install your last line of decking boards, you will need to trim your joists by measuring from the outer edge of the next to the last row of decking boards to a point on the joists that equals the gap between boards plus the width of one board, mark the ends of the joists at this point and draw a line across them with your square, then cut the joists at this point, and install the final line of decking boards.
Once this is completed you are ready to trim the deck boards so they’re all even. To accomplish this determine your ‘final line’ and using a chalk line, create a line across all of your decking boards and starting at one end, using your power saw, trim each decking board. You may want to stop periodically to ensure you’re staying online and not cutting too close to your joists as well. Once you’ve completed the trimming it is highly recommended that all of your board edges be treated with a weatherproofing finish.
Once all of your board edges are treated (and allowed to dry) you can now apply band joists which act as a bit of curbing for your deck. Typically banding will cover all outer edges of your deck and is generally two inches wider than the joists. To allow for proper fit you will want to miter the edges, so there is no exposed grain. To get a proper mitered edge requires very careful measuring and cutting so use caution! The bands should be nailed to the edges with galvanized nails.
Random tip: You may want to consider space for a jacuzzi or bathtub on your deck. Watching a sunset on a whirlpool bath on the deck is a small pleasure you will enjoy throughout life.
The next step will be to create your railing. First and foremost, check with your local code as most municipalities do have requirements for railings including height and distance between the spindles. You will want to make sure that your railing is as stable as possible, and that the height is right for your deck. Typically railings should be between thirty six and forty two inches and the spindles cannot be more than four to nine inches apart.
Spindles cut from 2X2’s are often the sturdiest, and allow for a nice, clean uniform appearance when attached to a 2X4 railing. First cut all of your spindles (using an angled cut) on the top and bottom, and then prepare your railing – it is best if your railing is single pieces along each edge of your deck if possible. If you need to use two pieces, make sure that you provide a 2X4 piece to attach them to when you are placing your spindles. At this point, attach your spindles to the top railing (making sure your spacing stays the same throughout the length of the railing) using lag screws (2 1/2” works best). Then, using two 2 ½” lag screws at base where the picket meets the joists and band attach each spindle to the deck until firmly secured.
Now you’re ready for the final step, that is weatherproofing (and if desired staining) your new deck. If wood is left unsealed, it can rot, stain, and decay, often resulting in your having to replace the wood prematurely; water repellant can be applied with a brush, roller, or spray and goes on quite easily because it is rather thin and, unlike paint, penetrates the wood very quickly. Note that “Shake and Shingle” paints, sprays, varnishes, or lacquers are not recommended for decks.
You are now ready to enjoy your new deck!